



Coffee Brewing Ratios Explained Simply for Better Coffee
Table of Contents
- Why Coffee Brewing Ratios Matter More Than You Think
- The Golden Ratio: Your Starting Point for Every Brew
- How to Calculate Your Coffee-to-Water Ratio
- Using a Coffee to Water Ratio Calculator
- The Impact of Grind Size on Brew Ratio
- How to Measure Coffee Grounds Without a Scale
- How Brewing Ratios Change by Method
- Troubleshooting Flavor: Adjusting Ratios for Roast Levels and Taste
- Frequently Asked Questions
Last Updated: September 14, 2026
Why Coffee Brewing Ratios Matter More Than You Think
Coffee brewing ratios explained simply come down to one idea: the relationship between coffee grounds and water determines whether your cup tastes balanced or bitter. Get that relationship right, and everything else in brewing becomes easier to control.
At Venro Coffee Co., we've watched home brewers chase expensive equipment while ignoring the one variable that changes flavor most. A $40 grinder paired with a correct ratio beats a $400 machine paired with guesswork every time. That's not marketing talk. It's the single fastest upgrade available to anyone brewing at home.
Here's the part most guides skip: ratio isn't just about strength. It shapes extraction, mouthfeel, and how clearly you taste a bean's origin notes. The Specialty Coffee Association maintains widely used brewing standards that treat ratio as a foundational variable, not an afterthought (Specialty Coffee Association brewing standards).
Below, we'll show you exactly how to set a ratio, adjust it by method, and fix a bad cup without starting over.
The Golden Ratio: Your Starting Point for Every Brew
The golden ratio for coffee is commonly expressed as 1:15 to 1:18, meaning one part coffee by weight to 15-18 parts water (Standards). Most home brewers land on 1:16 as a reliable default.
Think of it as a dial, not a rule. Lower numbers like 1:15 produce a stronger, heavier cup. Higher numbers like 1:18 produce something lighter and more tea-like. Neither is correct in isolation. The right setting depends on your method, your roast, and your taste.
What most guides miss is that the golden ratio is a starting point for calibration, not a destination. You pick it, brew, taste, then adjust. Treating it as fixed is how people end up stuck with coffee they don't enjoy.
How to Calculate Your Coffee-to-Water Ratio
Calculating a coffee-to-water ratio means dividing your total water weight by the ratio number to get your coffee dose. The math takes about ten seconds once you've done it twice.
The Simple Math Behind Every Recipe
Use this formula: water weight ÷ ratio = coffee weight.
- 480 grams of water ÷ 16 = 30 grams of coffee
- 300 grams of water ÷ 15 = 20 grams of coffee
- 500 grams of water ÷ 18 = 27.8 grams of coffee
Working backward is just as easy. If you want a 250-gram cup at 1:16, divide 250 by 16 and you get roughly 15.6 grams of coffee. That's your dose.
The reason weight beats volume here is consistency. A scoop of coffee varies by grind size, bean density, and how you fill it. A gram scale doesn't. If you're serious about repeatable results, a scale is the one tool worth buying before anything else.
Using a Coffee to Water Ratio Calculator
A coffee to water ratio calculator removes the arithmetic from your morning routine. You enter your desired yield and preferred strength, and it returns the exact dose in grams. The math behind it is the same formula from the previous section, just automated: water weight ÷ ratio = coffee weight. A calculator is only useful if you understand what it's doing, so here's what actually happens inside one.
What the Calculator Is Actually Solving For
Every calculator answers one of three questions, depending on which fields you fill in:
- Fixed water, unknown dose: You know you want 500 grams of brewed coffee at 1:16. The calculator returns 31.3 grams of coffee.
- Fixed dose, unknown water: You have 22 grams of beans left and want to use them all at 1:15. The calculator returns 330 grams of water.
- Fixed cup size, unknown everything: You want a 12-ounce mug (about 355 grams of brewed coffee) at 1:17. The calculator returns roughly 20.9 grams of coffee.
Most people only ever use the first mode. The second and third are where a calculator earns its place, because they let you work backward from a constraint instead of forward from a guess.
Why the Numbers Drift From the Calculator
A calculator assumes all the water you pour ends up in the cup. It doesn't. Grounds absorb roughly twice their weight in water, and some water stays behind in the brewer. That means your brewed yield is always lower than your pour weight.
A common pattern: you pour 500 grams of water over 31 grams of coffee, but only about 440 to 460 grams land in the carafe. The grounds hold the rest. If you're targeting a specific cup volume, add 10 to 15 percent to your pour weight to compensate. A calculator that ignores retention will consistently undershoot your target.
Switching Between Methods Without Redoing the Math
Here's where a calculator genuinely helps: switching between methods. A pour-over at 1:16 and a French press at 1:14 need different doses for the same cup size, and doing that math in your head at 6 a.m. is a losing battle.
Worked example, you want the same 12-ounce mug from both methods:
- Pour-over at 1:16: 355 grams yield ÷ 16 ≈ 22.2 grams of coffee
- French press at 1:14: 355 grams yield ÷ 14 ≈ 25.4 grams of coffee
That's a 3-gram difference for the identical cup. Multiply that across a week of brewing and you can see why eyeballing it fails.
If you're brewing with single-serve capsules, the ratio is already dialed in for you. Venro Coffee Co.'s 12 Pack Single Serve Coffee Capsules deliver a consistent cup without measuring anything, which is exactly what you want on a rushed morning.

The Impact of Grind Size on Brew Ratio
Grind size and brew ratio interact directly: a finer grind extracts faster, so it can handle a higher water ratio without tasting weak. A coarser grind extracts slower, so it often needs a lower ratio to avoid a thin cup.
This is the relationship most brewers miss. They change the ratio when the real problem is grind. If your coffee tastes sour and thin, the fix might be a finer grind, not more beans. If it tastes bitter and harsh, coarsening the grind often solves it before you touch the ratio at all.
A useful way to think about it: grind size controls how fast flavor leaves the grounds, and ratio controls how much water is available to carry it. Both need to be in range before a cup tastes right.
- Too fine + high ratio: over-extracted, bitter, drying
- Too coarse + low ratio: under-extracted, sour, weak
- Balanced grind + balanced ratio: sweet, clear, balanced cup
Get the grind close first, then fine-tune with the ratio. Reversing that order wastes beans.
How to Measure Coffee Grounds Without a Scale
You can measure coffee grounds without a scale using volume approximations, though accuracy drops. A standard tablespoon holds roughly 5 to 7 grams of ground coffee, depending on grind and how level the scoop is (Coffee Brews: Are They a Source of Macroelements in Human Nutrition?).
For a 1:16 ratio, that works out to about 2 tablespoons per 6 ounces of water. It's a rough guide, not precision, but it gets you into the right neighborhood.
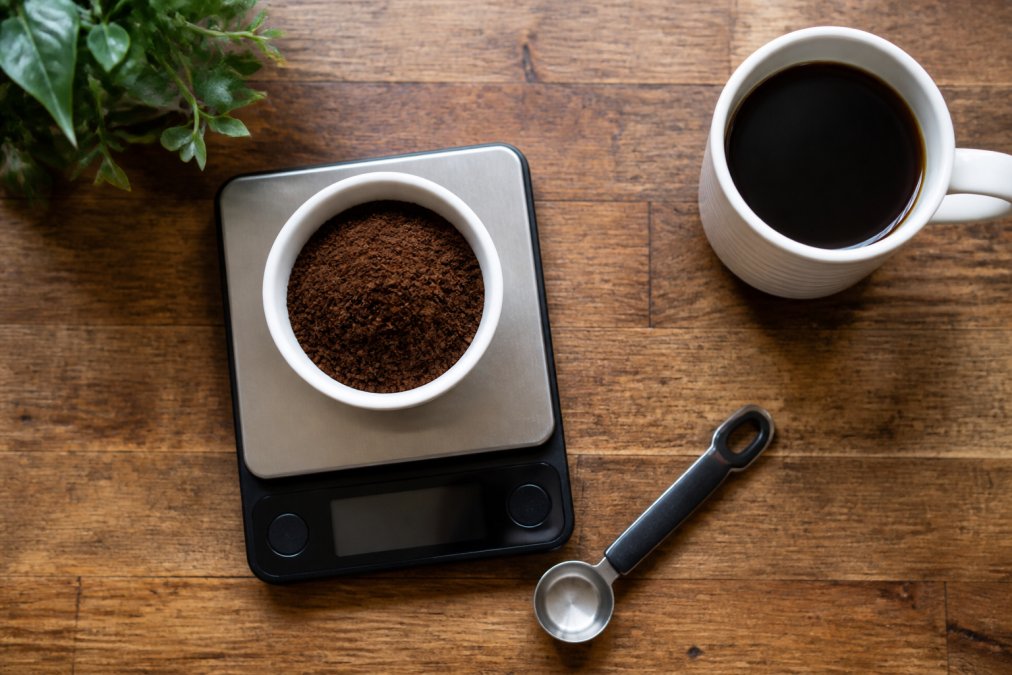
A few practical adjustments make volume measuring more reliable:
- Level your scoops. A heaped tablespoon can hold nearly double a level one.
- Match the scoop to the grind. Fine grinds pack tighter, so use slightly less.
- Weigh once, then eyeball. Weigh your normal dose one time, note how it looks in your scoop, and use that as your visual reference going forward.
How Brewing Ratios Change by Method
Brewing ratios shift by method because each technique extracts differently. Immersion brewing, like a French press, keeps grounds in contact with water the whole time. Pour-over relies on gravity and flow. Espresso forces water through at high pressure. Each needs its own starting point, and the reason is contact time and pressure, not tradition.
Pour-Over, French Press, and Espresso Compared
| Method | Typical Ratio | Grind | Brew Time |
|---|---|---|---|
| Pour-over | 1:15 to 1:17 | Medium-fine | 2.5-3.5 min |
| French press | 1:12 to 1:15 | Coarse | 4 min |
| Espresso | 1:2 to 1:2.5 | Fine | 25-30 sec |
| Drip coffee | 1:15 to 1:18 | Medium | 4-6 min |
Espresso looks extreme next to the others, and it is. The ratio is measured against the liquid yield, not the water you started with, which is why the numbers look so different. A 1:2 espresso shot means 18 grams of coffee in, roughly 36 grams of liquid out. The water that never made it into the cup doesn't count.
Why Each Method Sits Where It Does
- French press (1:12 to 1:15): Full immersion means every ground is in contact with water for the entire four minutes. That long contact extracts more, so a lower ratio (more coffee relative to water) keeps the cup from turning muddy. The coarse grind slows extraction to match.
- Pour-over (1:15 to 1:17): Water passes through the bed once, so contact time is shorter and less predictable. A slightly higher ratio compensates for the fact that not every ground gets fully saturated.
- Drip (1:15 to 1:18): The widest range because drip machines vary enormously in temperature and flow. A machine that runs hot and slow can handle 1:18; a fast, cooler machine usually wants 1:15.
- Espresso (1:2 to 1:2.5): Pressure does the extraction work in under 30 seconds. The tiny ratio is a function of concentration, not strength of flavor, you're making a syrup, not a beverage.
For drip and pour-over, the ranges above are forgiving. For espresso, small ratio changes show up immediately in the cup, so adjust in tiny increments, a half-gram of coffee or a two-second grind change is a real adjustment.
Adjusting the Ratio for Roast Level
This is the adjustment most method guides skip. Roast level changes how easily the coffee gives up its flavor, which means the same method can want two different ratios depending on the beans.
- Dark roasts are more porous and more soluble. They extract faster, so they often taste best at a slightly higher ratio (less coffee). A dark roast at 1:16 in a pour-over can taste cleaner than the same bean at 1:15, which may come across as ashy or flat.
- Light roasts are denser and resist extraction. They usually want a lower ratio (more coffee) or a finer grind to pull out their sweetness. A light roast at 1:17 often tastes hollow and tea-like; drop it to 1:15 and the fruit notes come forward.
A practical starting rule: if you switch from a dark roast to a light roast in the same method, tighten the ratio by one step (for example, 1:16 to 1:15) before you change anything else. If you switch from light to dark, loosen it by one step.
Water Quality as a Hidden Variable
Water is roughly 98 percent of your cup, and its mineral content interacts with the ratio in ways most guides ignore. Very hard water, high in calcium and magnesium, can mute delicate flavors and leave a chalky finish, which makes a correctly dialed ratio taste weak. Overly soft or distilled water lacks the minerals that help carry flavor, so coffee tastes flat no matter how much you adjust the dose.
If your ratio and grind are dialed in and the cup still tastes off, the water is the next variable to check. A simple test: brew the same recipe with bottled spring water and compare. If the cup improves noticeably, your tap water is the problem, not your ratio.
If you're brewing capsules at home, the ratio is preset, and Venro Coffee Co.'s Mexico Single Origin Coffee Pods are built around a medium roast that holds up well at standard capsule ratios.

Troubleshooting Flavor: Adjusting Ratios for Roast Levels and Taste
Troubleshooting flavor starts with identifying whether your cup is over-extracted or under-extracted, then adjusting the ratio and grind in the right direction. Taste is the diagnostic tool here, not the numbers.
Here's how to read what you're tasting:
- Sour, sharp, or salty: under-extracted. Try a finer grind or a lower ratio (more coffee).
- Bitter, harsh, or drying: over-extracted. Try a coarser grind or a higher ratio (less coffee).
- Weak but not sour: increase coffee dose slightly, keep grind the same.
- Strong but muddy: coarsen the grind before changing the ratio.
Roast level matters too. Darker roasts are more soluble, so they extract faster and often taste better at a slightly higher ratio. Lighter roasts resist extraction, so they usually want a lower ratio or a finer grind to pull out their sweetness. This is one of the most overlooked adjustments in home brewing, and it's the difference between a light roast tasting bright versus tasting hollow.
Water quality plays a role as well. Very hard water can mute flavors and leave a chalky finish, while overly soft water can make coffee taste flat. If your ratio and grind are dialed in and the cup still tastes off, the water is the next variable to check.
Getting coffee brewing ratios right is less about memorizing numbers and more about building a repeatable habit. Pick a starting ratio, adjust one variable at a time, and let your taste guide the rest. That's the whole method.

Venro Coffee Co. makes that process easier by removing the guesswork from sourcing. Freshly roasted beans, carefully sourced single origins, and convenient capsule options mean you're always starting with quality coffee worth dialing in. Explore the full range and find the roast that fits your ratio experiments. Shop Coffee with Venro Coffee Co. and taste the difference a properly brewed cup makes.
Frequently Asked Questions
What are the ideal brewing ratios for coffee?
The Specialty Coffee Association's gold standard is 1:18, meaning 1 gram of coffee to 18 grams of water. For a stronger cup, try 1:15. For a lighter, milder brew, go up to 1:19. These coffee brewing ratios work as a baseline for drip and pour-over. Espresso uses a much tighter ratio, roughly 1:2, because it is a concentrate rather than a full cup. Start at 1:18 and adjust to taste.
How do I calculate the coffee-to-water ratio without a calculator?
Use a simple ratio and multiply. For 1:16, divide your total water weight by 16 to get your coffee dose. If you want a 12-ounce cup (about 355 grams of water), divide 355 by 16 and you get roughly 22 grams of coffee. A coffee to water ratio calculator speeds this up, but the mental math is quick once you memorize one or two ratios that suit your taste.
Does the coffee brewing ratio change for different brew methods?
Yes, and the grind size matters just as much. French press and drip coffee typically sit between 1:15 and 1:18. Pour-over often lands near 1:16 to 1:17. Espresso runs about 1:2 because it is served as a concentrate. The impact of grind size on brew ratio is real: finer grinds extract faster, so you may need a slightly coarser setting or a shorter brew time to avoid a bitter, over-extracted cup.
How much coffee grounds should I use for 16 ounces of water?
Sixteen ounces of water weighs about 473 grams. At the gold-standard 1:18 ratio, that means roughly 26 grams of coffee, which is about 3 tablespoons of medium-ground beans. At a stronger 1:15 ratio, you would use about 32 grams, or 4 tablespoons. If you are measuring without a scale, start with 3 level tablespoons and adjust based on how the cup tastes.