



How to Identify High Quality Coffee Roast Profiles
Table of Contents
- Reading the Roast Curve: The Foundation of Coffee Roast Profiles
- Visual and Sensory Indicators of a High-Quality Roast
- Coffee Roast Development Time and the Development Time Ratio
- Identifying Coffee Roast Defects Before They Ruin the Cup
- How to Cup Coffee for Quality Assessment
- Green Coffee Density and Moisture: Matching the Profile to the Bean
- Data-Driven Profile Logging: Tracking Coffee Roast Profiles Over Time
- Conclusion
- Frequently Asked Questions
Last Updated: September 16, 2026
Reading the Roast Curve: The Foundation of Coffee Roast Profiles
Learning how to identify high quality coffee roast profiles starts with one document: the roast curve. A roast curve is a graph that plots bean temperature against time during the roast, and it is the single most reliable record of what happened inside the drum. At Venro Coffee Co., every batch we roast to order is carefully monitored. Below, we break down the curve, the sensory cues, and the defects that separate a clean profile from a muddy one.
Three phases structure every curve. Drying runs from charge to roughly 300°F bean temperature, when the beans lose moisture. The Maillard reaction follows, building color and complexity. First crack marks the start of development, and everything after it determines sweetness, body, and acidity.
The most common mistake is judging a roast by color alone. Two batches can look identical on the Agtron scale and taste completely different.
Visual and Sensory Indicators of a High-Quality Roast
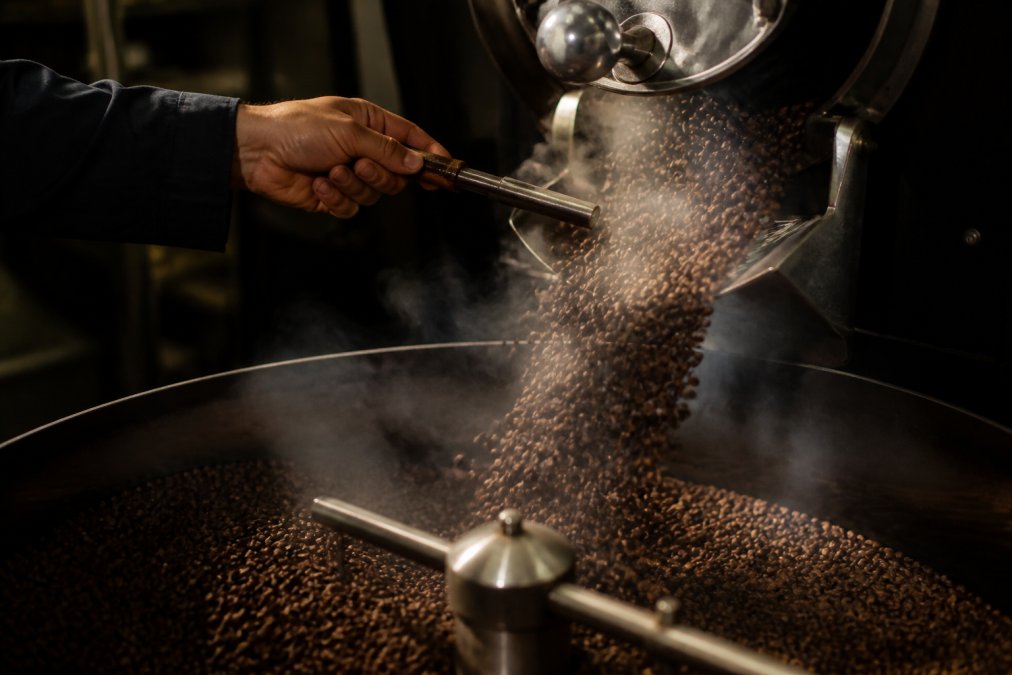
Sensory roasting is the practice of reading a roast through sight, smell, and sound rather than relying only on instruments. A high-quality roast shows even color across the batch, a clean grassy-to-bready aroma shift, and a first crack that arrives with a steady, rolling rhythm instead of a scattered pop.
Visual consistency matters more than darkness. Look for uniform color across the bean surface with no tipping, scorching, or charred edges, and check that the seam opens evenly rather than cracking on one side. Under good light, a medium roast should show a matte surface with a faint sheen, not an oily gloss.
Sound carries information too. A healthy first crack sounds like popcorn at a steady cadence. If the cracks come in bursts or stall entirely, the roast is stalling or racing, and the flavor profile will follow.
Smell tracks the chemistry. Early in the roast you get hay and bread; as caramelization builds, that shifts to caramel, then cocoa, then a sharper smoky note if you push too far.
Coffee Roast Development Time and the Development Time Ratio
Coffee roast development time is the span between the start of first crack and the moment you drop the beans into the cooling tray. The development time ratio, or DTR, expresses that span as a percentage of total roast time. A common target range sits between 20 and 25 percent, though the right number depends on the bean and the intended flavor.
Push development too short and you get underdeveloped, grassy, sour notes. Stretch it too long and you flatten the acidity, mute the origin character, and drift toward baked or roasty flavors.
Calculating DTR from First Crack to Drop
The math is simple. Divide development time by total roast time, then multiply by 100.
- Total roast time: 11 minutes
- First crack begins: minute 8
- Drop: minute 11
- Development time: 3 minutes (180 seconds)
- DTR: 3 ÷ 11 = 27 percent
Log both numbers on every batch. Small shifts in DTR often explain flavor changes that color readings miss.
Identifying Coffee Roast Defects Before They Ruin the Cup
Identifying coffee roast defects early saves a whole batch. Most defects show up in the curve before they show up in the cup, which is why logging matters. The four failures below account for the majority of flawed roasts, and each one has a distinct curve signature, a distinct cup signature, and a distinct control that fixes it.
- Flick: rate of rise climbs again late in the roast, usually in the final 90 seconds. The bean surface keeps gaining heat after development should be tapering. Tastes ashy and bitter, with a drying finish.
- Crash: rate of rise drops sharply into first crack, often by more than half in under a minute. Tastes baked and flat, with the sweetness replaced by a papery mid-palate.
- Scorching: high initial heat burns the bean surface before moisture can escape. Tastes smoky and harsh, and the defect is visible as dark patches on flat sides of the bean.
- Baking: a long, slow finish with no clear development and a rate of rise that hovers near zero. Tastes papery and dull, and the aroma flattens within a day of roasting.
Each defect traces to a specific control: charge temperature, airflow, drum speed, or heat application. Adjust one variable at a time and log the result. Changing two controls in the same batch tells you nothing about which one caused the improvement.
Common Curve Failures and What They Taste Like
The table below maps each failure to its sensory signature and the fix that usually resolves it.
| Curve Failure | Cup Signature | Likely Fix |
|---|---|---|
| Late flick | Ashy, bitter finish | Reduce heat before first crack |
| Rate-of-rise crash | Baked, flat, papery | Raise airflow, smooth heat ramp |
| Scorched surface | Smoky, harsh, acrid | Lower charge temperature |
| Stalled development | Grassy, underdeveloped | Extend development past 20 percent DTR |
A Diagnostic Workflow for Flavor Flaws
When a batch cups poorly, work backward from the flavor rather than forward from the curve. The sequence below is the one most roasters settle into after a few dozen logged batches.
- Name the flaw in one word. Grassy, baked, ashy, or smoky. If you cannot name it, cup again after the coffee cools below 140°F, where defects read more clearly.
- Locate the phase. Grassy points to development; baked points to the Maillard phase and the approach to first crack; ashy points to the final minute; smoky points to the first two minutes.
- Check the rate of rise at that phase. A flick in the last minute explains ashy. A crash between minutes six and eight explains baked. A rate of rise above roughly 30°F per minute early explains scorching.
- Change one control and re-roast. Lower charge temperature for scorching, raise airflow for a crash, cut heat earlier for a flick, extend development for grassy.
- Log the result against the original curve. If the flaw persists, the cause is upstream, green coffee moisture, batch size, or a probe that needs calibration.
Defects That Start With the Green Coffee
Not every flaw is a roasting flaw. Tipping and facing, small dark burns at the ends or flat sides of the bean, often trace to low moisture content in the green coffee rather than to charge temperature. If a lot tips at a charge temperature that worked for the previous lot, ask your importer for the moisture spec before you change your profile. The same logic applies to faded or baggy greens: no curve adjustment fully restores aromatics that were lost in storage.
green coffee moisture and water activity guidance
How to Cup Coffee for Quality Assessment
Cupping is the standardized method for evaluating coffee roast profiles by taste, aroma, and body under controlled conditions. It removes brewing variables so the roast itself is what you judge. Set up identical doses, identical water temperature, and identical steep times across every sample.
Here is the standard sequence:
- Weigh 8.25 grams of coffee per 150 ml of water.
- Grind medium-coarse and place in the cup.
- Pour water just off the boil and start the timer.
- Break the crust at four minutes and smell the aroma.
- Skim the surface and let the cup cool.
- Slurp from a spoon to spread the coffee across the palate.
- Score acidity, sweetness, body, and aftertaste separately.
Cool the cup before scoring. Many defects only appear as the coffee drops below 140°F.
Green Coffee Density and Moisture: Matching the Profile to the Bean
Green coffee density and moisture content determine how a bean should be roasted. Dense, high-grown beans tolerate more heat and longer development, while low-density beans roast faster and scorch more easily. Matching the profile to the bean is the difference between a clean cup and a muddled one.
A few practical rules:
- High-density beans: start with a higher charge temperature and a longer drying phase.
- Low-density beans: lower charge temperature, gentler heat, shorter total time.
- High-moisture greens: extend the drying phase to avoid tipping.
- Low-moisture greens: shorten the roast to prevent baked flavors.
You cannot read density by eye. Weigh a fixed volume of green beans and compare across lots, and ask your importer for the moisture spec on every shipment.
Data-Driven Profile Logging: Tracking Coffee Roast Profiles Over Time
Data-driven profile logging turns roasting from a craft you remember into a process you can repeat. Every batch should record bean temperature, environmental temperature, rate of rise, first crack time, drop time, DTR, and the cupping score. Without those numbers, you are guessing.
A simple log works. A spreadsheet with one row per roast and columns for each metric will outperform a notebook every time, because you can sort by DTR or rate of rise and spot patterns across dozens of batches. But the real edge comes from reading the log the way a roaster reads a curve, not just storing it.
How to Read a Digital Roast Log
Roast profiling software such as Cropster and Artisan plots the same three lines on every batch: bean temperature, environmental temperature, and rate of rise. Learning to read them in order is the skill that separates a repeatable roaster from a lucky one.
- Bean temperature is the primary curve. It should rise smoothly through drying, accelerate gently through the Maillard phase, and flatten after first crack. A flat spot before first crack usually means the roast is stalling.
- Environmental temperature is the probe in the drum, not in the bean mass. It leads bean temperature by design. A widening gap between the two means the drum is hotter than the beans, which is normal early and dangerous late.
- Rate of rise is the derivative of bean temperature. It should decline steadily from charge to drop. The shape of this line, more than any single number, predicts what the cup will taste like.
Most practitioners find that a rate of rise starting near 30°F per minute and declining to roughly 5°F per minute at drop produces a clean, sweet cup across a wide range of origins. Deviations from that shape are the first place to look when a batch tastes off.
Building a Reference Curve Library
The single most useful habit in profile logging is keeping a known-good curve for each origin and process. When a new lot arrives, roast it against that reference and note every deviation, charge temperature, first crack time, DTR, and the shape of the rate-of-rise line. The differences tell you more about the bean than any spec sheet.
A workable library structure:
- One folder per origin, with subfolders for washed, natural, and honey process.
- One reference curve per folder, labeled with the date it last cupped well.
- One log entry per roast, with the cupping score and a one-line tasting note.
- A monthly review where you sort by cupping score and look for curve shapes that repeat at the top.
The Logging Workflow That Works
- Log every batch, even the failures. Failures are the most informative rows in the file.
- Review the last ten roasts before you start a new one, not after.
- Compare cupping scores against the curve, not against memory.
- Adjust one variable per roast so you can attribute the change.
- Back up the log. A roast profile file is the only record of how a batch was made.
What to Do With the Data
Logging only pays off if it changes a decision. Three uses justify the effort. First, dialing in a new lot: compare its first roast against the reference curve and adjust charge temperature or development time before the second batch. Second, diagnosing a flavor drift: if a coffee that cupped well last month now tastes flat, the log shows whether DTR, first crack time, or the rate-of-rise shape moved. Third, training: a new roaster can study the reference curves and see what a clean roast looks like before they ever touch the drum.
Conclusion
Roasting consistently well comes down to reading the curve, trusting your senses, and logging what you learn. Most home roasters stop at color and miss the rate of rise, the DTR, and the defects that quietly flatten a batch. Venro Coffee Co. ships every order fresh, and offers a Best Sellers Coffee Sample Pack and a Single Origin Favorites Sample Pack so you can cup several profiles side by side and taste the difference yourself.

Frequently Asked Questions
How does roast development time affect coffee quality?
Development time is the stretch between first crack and when the beans leave the roaster. As a share of total roast time, it is called the development time ratio. Too short, and the coffee tastes grassy or sour because sugars have not caramelized enough. Too long, and you lose acidity and gain baked or ashy notes. Many roasters aim for a development time ratio around 20 to 25 percent, though the ideal shifts with bean density and the flavor profile you want.
Can you identify roast quality by looking at the beans?
Visuals get you part of the way. Look for even color across the batch, a smooth surface on medium roasts, and no scorch marks, tipping, or chipping. An Agtron scale reading gives a numeric color score, which is useful for consistency. But appearance alone cannot confirm sweetness or clarity. Pair the visual check with cupping and a look at the roast curve before you judge a coffee roast profile.
What are the key indicators of a high-quality coffee roast profile?
A clean rate of rise that declines smoothly without flicking up near the end, first crack landing where the curve predicts, and a development time ratio that suits the bean. On the sensory side, expect clear sweetness, balanced acidity, and a finish free of ash or paper. If you log data, consistent bean temperature and environmental temperature readings batch to batch confirm the profile is repeatable, not a one-off.
How do roast defects impact the final cup quality?
Defects show up directly in the cup. Scorching from too much heat early gives a burnt, bitter taste. Baking from a stalled rate of rise flattens the flavor and adds a cardboard note. Tipping and chipping from excessive drum speed or heat create uneven extraction and harshness. Catching these in the identifying coffee roast defects stage lets you adjust airflow, heat application, and batch size before you commit a full production run.
Reading a roast curve is a skill, not a talent, and it rewards anyone willing to log, cup, and adjust. Venro Coffee Co. makes that practice easier by delivering freshly roasted, carefully sourced specialty coffee straight to your door, with whole bean and ground options, single-origin and blend variety, and convenient sample packs for comparison cupping. Get started with Venro Coffee Co. and taste what a properly developed roast actually delivers.