



How to Dial in Espresso Shots at Home in 2026
Table of Contents
- Why Your Espresso Shots Taste Off (and What Dialing In Means)
- Gear You Need Before You Start Dialing In Espresso
- Espresso Yield vs Ratio: The Numbers That Matter
- Step-by-Step: How to Dial in Espresso Shots at Home
- Taste the Result: Sour vs. Bitter and What to Adjust
- How to Adjust Espresso Brew Time Without Confusion
- Espresso Extraction Troubleshooting: Fixing Channeling and Uneven Flow
- The Hidden Variables: Water Chemistry and Basket Size
- When to Stop Dialing In and Just Enjoy the Coffee
- Frequently Asked Questions
Last Updated: September 8, 2026
Why Your Espresso Shots Taste Off (and What Dialing In Means)
If your espresso tastes sour one morning and bitter the next, the problem isn't your machine or your beans. It's that you haven't dialed in espresso shots to match that specific coffee. Dialing in espresso is the process of adjusting your grind size, dose, and yield to extract the flavors a particular roast is capable of producing. This guide from Venro Coffee Co. walks through exactly how to do it at home, without the guesswork.
The concept sounds technical, but the goal is simple: balance sweetness and acidity so no single flavor dominates. When you change beans, even between batches of the same roast, the ideal settings shift. Freshly roasted coffee degasses over time, which means yesterday's perfect shot might run too fast or too slow today. That's not a failure of your equipment. It's the normal behavior of a living product.
Below, we'll show you exactly how to translate what you taste into specific hardware adjustments. By the end, you'll have a repeatable routine that works for any coffee you buy, whether it's a bright single origin or a dark, chocolate-forward blend.

Gear You Need Before You Start Dialing In Espresso
Before pulling your first test shot, confirm you have the basic tools. Dialing in espresso without a scale is like baking without measuring cups: you can guess, but you'll waste time and coffee. A digital scale accurate to 0.1 grams is non-negotiable. You also need a timer, though most modern machines have one built in.
The other essentials are less obvious. A distribution tool or dosing funnel keeps grounds level before tamping, which prevents uneven flow. A WDT tool, essentially a thin wire whisk, breaks up clumps in the ground coffee. Many home baristas skip these and wonder why their shots channel. The portafilter basket matters too; a precision basket with flat sides and uniform holes extracts more evenly than the stock double basket most machines ship with.
If you're coming from a pressurized basket, expect a learning curve. Pressurized baskets mask poor grind size by forcing coffee through a single hole. Switching to a non-pressurized basket exposes every flaw in your technique, which is exactly what you want when learning how to dial in espresso shots at home.
Espresso Yield vs Ratio: The Numbers That Matter
Espresso yield vs ratio confuses more home baristas than any other concept. The ratio simply compares your dry coffee dose to the liquid espresso weight in the cup. A 1:2 ratio means 18 grams of ground coffee produces 36 grams of liquid espresso. Yield is that final liquid weight, and it's what you measure on the scale.
Start with a 1:2 ratio for most coffees. Light roasts often taste better slightly longer, around 1:2.5, because they're denser and harder to extract. Dark roasts extract easily and usually shine at 1:1.8 to 1:2, since pushing them further brings out bitter, ashy notes. The roast profile of your beans should guide your starting point.
The Specialty Coffee Association defines espresso as a beverage brewed at a specific concentration, and the SCA's brewing standards recommend a brew ratio that lands within a particular total dissolved solids range. You don't need a refractometer to benefit from this framework. The ratio gives you a consistent target so taste adjustments mean something. Without it, you're adjusting blindly.
| Roast Profile | Starting Ratio | Typical Dose | Typical Yield |
|---|---|---|---|
| Dark roast | 1:1.8 to 1:2 | 18 g | 32-36 g |
| Medium roast | 1:2 | 18 g | 36 g |
| Light roast | 1:2.2 to 1:2.5 | 18 g | 40-45 g |
Step-by-Step: How to Dial in Espresso Shots at Home
This is where the routine comes together. The full process takes 15 to 20 minutes and roughly four test shots on a new bag of coffee. Once you've dialed in espresso shots for a particular bean, you'll only need minor tweaks as the bag ages. But the process isn't a straight line, it's a feedback loop where you use visual cues, not just the clock, to guide your next move.
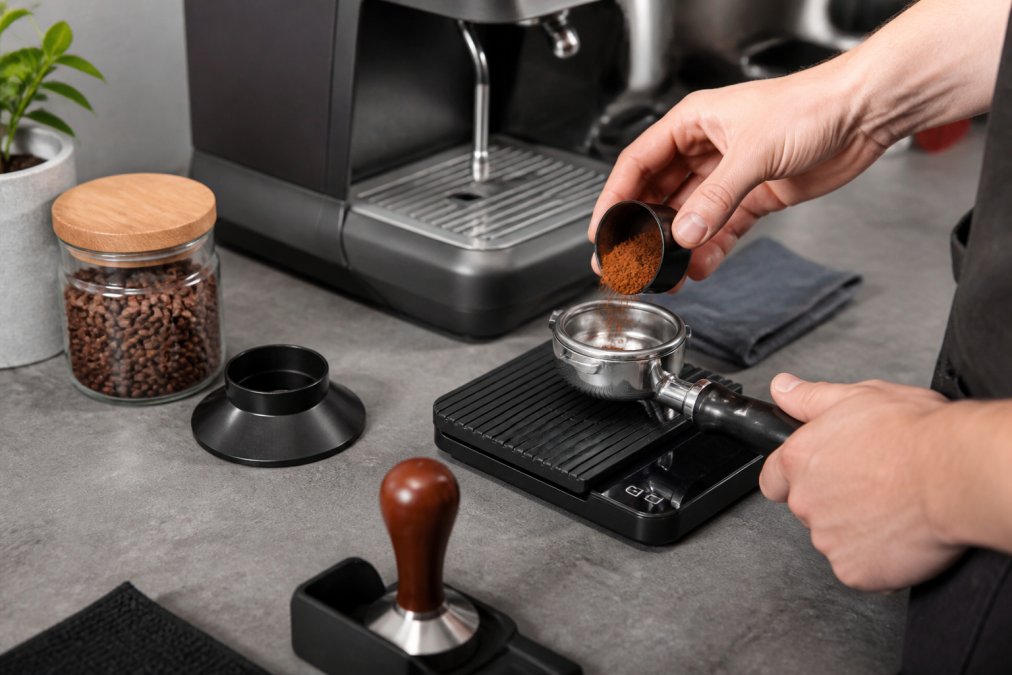
Step 1: Lock in Your Dose
Your dose is the amount of ground coffee in the basket, and it stays fixed while you adjust everything else. Choose a dose that fits your basket. Most modern double baskets hold 18 to 20 grams comfortably. If your basket is sized for 18 grams, don't cram 20 grams into it; you'll create headspace problems that cause channeling. Weigh every dose and grind directly into the portafilter to avoid losing grounds.
Step 2: Set a Baseline Grind Size
Grind size is the variable you'll adjust most. Start finer than you think you need. A common mistake is starting too coarse, which produces fast, sour, under-extracted shots that teach you nothing. Set your grinder to a fineness where the espresso takes roughly 25 to 30 seconds to reach your target yield. If you don't know where that is on your grinder, choose a setting that looks like fine table salt and adjust from there.
Step 3: Pull, Time, and Weigh Your First Shot
Lock the portafilter in, place your scale under the spout, and start the timer the moment you flip the switch. Stop the shot when the scale reads your target yield, not when the timer hits a number. Shot time is the result of your grind size, not the goal itself. Record three numbers for every shot: dose, yield, and time. This log is what makes dialing in espresso a science instead of a guessing game.
Step 4: Read the Flow, Not Just the Clock
Before you even taste the shot, watch the stream. This is the visual cue that most guides skip. A proper extraction starts with a few thin, dark strands that slowly widen into a smooth, honey-like flow. The color should stay consistent, a deep reddish-brown, until the very end. If the stream starts pale and watery, your grind is too coarse. If it sputters or sprays, your grind is too fine or your puck prep is uneven. If the flow starts thick and then suddenly turns pale yellow and watery (blonding) well before you hit your target yield, your extraction is finishing early, and you'll taste it as sour and thin.
Step 5: Taste and Make One Adjustment at a Time
Now taste the shot. Use the flavor guide above to decide whether to grind finer or coarser. The key is to change only one variable at a time. If you change the grind and the dose simultaneously, you won't know which adjustment caused the change. Pull another shot and repeat. Most shots will be dialed in within three to five attempts. If you're on attempt four and the shot is still sour, don't just grind finer, check your water temperature and your basket's headspace. A common hidden issue is that the dose is too low for the basket, leaving too much air above the puck, which causes the water to hit the coffee unevenly and produce a sour, channeled shot no matter how fine you grind.
Step 6: Confirm and Log Your Settings
Once the shot tastes balanced, sweet, with a pleasant acidity and a smooth finish, you're dialed in. Note the exact grind setting, dose, yield, and time in a log. When you buy the same roast again, start with those settings and make small adjustments for the bean's age. A bag that's been resting for two weeks will need a slightly finer grind than a bag that was roasted three days ago.
Taste the Result: Sour vs. Bitter and What to Adjust
Tasting is where most guides lose people, because they describe flavors abstractly. Here's the practical translation, but you need to go beyond just sour and bitter. A properly extracted shot has sweetness, acidity, and body in balance. When you're off, the shot will usually tell you exactly how in one of four ways.
Sour (Under-Extracted): Tastes sharp, salty, or aggressively acidic, like lemon juice on your tongue. It means the water didn't extract enough soluble flavor from the coffee. The fix is to grind finer, which slows the flow and increases contact time. If you're already grinding fine and the shot is still sour, your water temperature may be too low, or your dose is too high for your basket.
Bitter (Over-Extracted): Tastes dry, harsh, or ashy at the back of your throat. It means you extracted too much, pulling harsh compounds out of the coffee. The fix is to grind coarser, which speeds up the shot and pulls less from the bean. If you're already coarse and it's still bitter, your water temperature may be too high.
Salty or Metallic: This often appears alongside sourness and indicates a very fast, under-extracted shot where the coffee's volatile acids dominate. It's a sign you need to grind finer, but also check that your puck prep isn't causing immediate channeling.
Astringent or Drying: This feels like a rough, mouth-drying sensation, similar to over-steeped tea. It's a sign of over-extraction, but often from channeling rather than a uniform over-extraction. If the shot tastes astringent but ran fast, you likely have a channel, not a grind problem.
Change the grind one small step at a time, then pull another shot. Micro-adjustments matter here; jumping several grind settings at once overshoots the sweet spot. A good rule of thumb: if the shot is sour, grind finer by one small increment. If it's bitter, grind coarser by one small increment. If it's both sour and bitter, you have a channeling problem, not a grind problem.
This feedback loop is the heart of dialing in espresso shots at home. Trust your palate over the clock. A 20-second shot that tastes balanced is better than a 30-second shot that tastes like ash. But don't ignore the visual cues either. A shot that blondes early will taste thin and sour; a shot that drips slowly and looks syrupy may taste bitter. The taste is the final judge, but the flow rate and crema color give you a real-time preview of what's coming.
How to Adjust Espresso Brew Time Without Confusion
Understanding how to adjust espresso brew time starts with a counterintuitive fact: you don't adjust time directly. Brew time is a symptom of grind size, dose, and pressure. The only way to change how long a shot runs is to change how fast water moves through the puck. Grind finer and the shot slows down. Grind coarser and it speeds up.
Aim for a shot time between 25 and 30 seconds for a 1:2 ratio at standard 9 bars of pressure. If your shot finishes in 18 seconds, grind finer. If it's still dripping at 40 seconds, grind coarser. But treat these numbers as a starting window, not a rule. Some light roasts taste incredible at 35 seconds, and some dark roasts peak at 22 seconds. The time matters only because it correlates with extraction.
Pressure profiling machines complicate this slightly. If your machine lets you adjust pressure during the shot, a gentle pre-infusion at low pressure for 5 to 8 seconds, then full pressure, often improves flow rate and reduces channeling. But for most home setups, grind size is the only lever you need.
Espresso Extraction Troubleshooting: Fixing Channeling and Uneven Flow
Espresso extraction troubleshooting usually comes down to one culprit: channeling. Channeling happens when water finds a weak path through the puck and rushes through it, over-extracting that path while under-extracting the rest. The result is a shot that tastes sour and bitter at the same time, with thin, pale crema.
The most common causes of channeling are uneven tamping, clumpy grounds, and too much headspace above the puck. Fix clumps with a WDT tool before tamping. Ensure your tamper sits level; a tilted tamp directs water toward the low side. Check that your basket isn't overfilled. You want about 2 millimeters of space between the top of the tamped puck and the shower screen.
Visual cues beyond time help you spot problems early. Watch the stream as the shot pulls. It should start as a few thin, dark strands and widen into a smooth, honey-like flow with a consistent color. If you see blonding, where the stream turns pale yellow and watery, near the end of the shot, your extraction is finishing too early. If the flow sputters or sprays, your grind is likely too fine or your puck prep is uneven.
The Hidden Variables: Water Chemistry and Basket Size
Two variables rarely covered in beginner guides make the difference between good espresso and great espresso. The first is water chemistry. Espresso is roughly 98 percent water, so the minerals in your tap water directly affect extraction. Water that's too soft produces sour, acidic shots because there aren't enough minerals to carry flavor out of the coffee. Water that's too hard scales your machine and tastes chalky. guidance from the Specialty Coffee Association on water quality recommends a specific range of alkalinity and hardness for brewing. A simple test kit tells you where your water falls, and a basic carbon filter or remineralization packet fixes most issues.
The second hidden variable is basket size and headspace. Your basket is designed for a specific dose range, printed on its side. Using a dose far below the basket's capacity leaves too much air above the puck, which causes the water to hit the coffee unevenly. Using too much coffee prevents the puck from expanding properly during pre-infusion. Match your dose to the basket's rating, and if you want to change your dose, buy a basket designed for that size.
Burr alignment and grinder calibration also deserve attention. Even expensive grinders drift out of alignment over time, producing inconsistent particle sizes that make dialing in espresso impossible. If your shots are erratic despite consistent technique, check your grinder's burrs for wear and verify they're parallel. Many grinders include a calibration mechanism, and manufacturer guidance on burr alignment explains how to check and reset it.
When to Stop Dialing In and Just Enjoy the Coffee
There's a point of diminishing returns in dialing in espresso shots at home, and recognizing it saves you both coffee and sanity. Once your shot tastes balanced, with sweetness up front and a pleasant finish, stop adjusting. Chasing an imaginary perfect shot will drive you mad, because every bag of coffee changes slightly as it ages.
A bag of freshly roasted coffee hits its peak flavor window about five to fourteen days after roasting. Within that window, you may need to grind slightly finer every few days as the beans degas and the shot speeds up. That's normal maintenance, not a sign that something is wrong. Expect to make one small grind adjustment per week, not per day.
The best espresso you've ever had probably came from a café with a $10,000 grinder and a barista who pulls hundreds of shots weekly. Your home setup won't match that, and it doesn't need to. A well-dialed shot from a solid grinder and fresh beans beats a mediocre café shot every time. When you find a coffee that tastes great with minimal fuss, buy it again. That's the real reward of learning to dial in espresso: knowing exactly what your coffee needs, and knowing when it's already good enough to enjoy.
Mastering how to dial in espresso shots at home transforms your daily cup from a routine caffeine hit into a genuinely satisfying ritual. The process takes practice, but the feedback loop is consistent: taste, adjust the grind, and pull another shot until the flavors balance. Venro Coffee Co. offers freshly roasted, carefully sourced specialty coffees, so you're always working with coffee that has the sweetness and complexity worth extracting. Explore our single-origin offerings and signature blends, each roasted to a profile that rewards careful dialing in. Get started with Venro Coffee Co. and taste the difference fresh, properly dialed espresso makes.
Frequently Asked Questions
How many shots should it take to dial in espresso?
Expect to use 3 to 5 shots when you first dial in espresso with a new bag of beans. The first shot establishes a baseline. The next two or three confirm whether you need to adjust the grind size or yield. Once you pull two consecutive shots that taste balanced and run in the 25 to 30 second window, you are dialed in. Write down those settings, because they will change with the next roast.
What are the signs of over-extracted vs. under-extracted espresso?
Under-extracted espresso tastes sour, sharp, or salty, and the shot often runs too fast with thin crema. Over-extracted espresso tastes bitter, dry, or ashy, and the shot usually runs too slow with a dark, spotted crema. When you are troubleshooting espresso extraction, fix sour shots by grinding finer or increasing the yield. Fix bitter shots by grinding coarser or reducing the yield.
Is an espresso shot 1 or 2 oz?
A single shot is about 1 fluid ounce, and a double shot is about 2 fluid ounces. But weight matters more than volume when you dial in espresso. Weigh the liquid coffee in grams instead of measuring ounces in a glass. A standard double shot starts with 18 grams of dry coffee and yields around 36 grams of liquid espresso. That is a 1:2 espresso yield vs ratio.
What is the easiest way to make espresso shots at home?
The easiest path is a semi-automatic machine with a quality burr grinder, a digital scale, and freshly roasted beans. Start with an 18 gram dose, grind fine enough to hit a 25 to 30 second shot time, and aim for a 1:2 ratio of coffee to liquid espresso. A medium-dark blend like Venro's African Espresso offers a balanced roast profile with acidity and body.